Saturday, January 12, 2013

Boxer Rebellion part 2


Greetings my friends. We are here at the second entry for my Boxer Rebellion project. I have started to lay out my buildings and walls to see how everything fits and I have to say that I am very pleased with the results.

The first view is looking towards the main wall with the British Legation on the right and the Soo Wang Fu on the left. As noted by the bridges, the canal will run directly down the center of the table.

The walls in the foreground are made from thick (1/2") foam core covered with a wallpaper I obtained at a discount store for about $5 a roll. The tops of the walls are made from corrugated cardboard to look like roof tiles. Buildings are mostly made of ceramic and some were obtained from Christmas Village manufacturers.

The above view shows a closer look at the city wall with the Russian Legation in the lower left. Closer to the wall will be the American Legation with the German and Spanish legations. Also in the upper left corner is a temple. This piece was obtained at a pet store for a mere $10.00.
This view shows the numerous Chinese hoses that I made about 12 years ago (good grief was it that long already!). These are made from 1/4" foam core cut into various patterns with doors and windows and then glued together into a myriad of sizes. All the roofs are made from corrugated cardboard that was scored to give the impression of tiles roofs. Very inexpensive and I think very effective. They are all hollow, light weight and durable. The center poles are just pieces of wood dowel.
Some of the buildings scattered about may or may not be used in this game but made it on the table for now to take up spaces or just because I needed a place to put them.

Well more to come soon I hope. I need to finish painting the Japanese Legation and create some movable barricades. So please enjoy and as always comments are welcome.
Good Gaming!
Greg


Sunday, January 6, 2013

Boxer Rebellion Project - Too long in the making


Hello to all and I hope that your Holidays were happy and pleasant!
I have decided to start posting a brief history of my ongoing Boxer Rebellion project that focuses on the 55 day siege at Peking. I have always been interested in the historical events where one side no matter how heavily outnumbered or unlikely to survive, manage to pull out the victory and live to fight another day. Examples are of course Roarkes Drift, The Alamo (even though they did not make it) Major Dundee crossing the Rio Grande (oh wait, that's not historical).
So about 20 years ago I decided to do the siege of the Legations in Peking. Over the course of the years I have drawn up maps of the Legation area and translated them onto tables. I have collected books on the subject and even obtained a copy of the official report written by a British officer. I acquired figures from wherever and whenever I could and even have most of them painted!
As you can see from my first picture, I had the grand idea of presenting this game on two tables using the canal as the dividing line (this was actually dry during the time of the siege).

The larger table was to be 5'X12' and the smaller one was to be a ping pong table about 5'X8'. Populating this size of an area would have been a tremendous task and I began to lag behind in completing this project.
But urged on by Bill, one of the 'Gang of Four', our war gaming group, I have begun the process of finishing this project.
First I will compress the Legations onto one table, the 5'X12'. After having done this and added the dry canal to the layout, I will paint up any lacking buildings(about 3 or 4) and add more Boxers to my forces.
Here you can see the table with many of the building just placed anywhere just to get an idea of space. The base for this project are multiple tiles of 3/4" dense foam painted and flocked in grass ground and road surfaces. There are about 32 of these and I will need to modify the center ones to accommodate the canal.
More on the details of this later.


Soon to follow will be pictures of the general layout of the Legations without all the details. Here though are pictures of most of the figures for the game. As mentioned earlier, I have been working on this for many years. The figured are made by Falcon (the old 25mm ones from Medford Massachusetts), Foundry, Richard Houston and Old Glory. There are about 400 Imperial Chinese and 100 Boxers. The Legation forces are naturally much smaller but I think all told there are about 120 of them. Not all figures are shown in these pictures but here is a preview.


Thanks for looking and I will update you as I go along. Special rules and some notes on scenery and figures will also be included.
Take care and good gaming.
Greg

Sunday, October 28, 2012

Plataea - the final battle for this campaign season

Good day to all. As you can see by the title, this is the last Tactica game at Mikes house for this campaign season. Due to the weather conditions (it is too cold in Mikes basement) we will not play again until next Spring.
But enough of the bad news and on to the battle!
This game was the battle of Plataea which was fought in 479BC between the Persian Empire and a coalition of Greek city states lead by Sparta. Using the Tactica rule set (as Tactica II still has not been released ), our armies are described below.
Persia - played by Mike and Bill:
16 Heavy Infantry
6 Light Infantry
2 Medium Cavalry

Greece - played by Ken and myself:
11 Heavy Infantry
6 Light Infantry
2 Medium Cavalry

As you can see the Greeks are outnumbered in heavy infantry but this is balanced by the fact that the Persians took casualties on a 4-6 on a six sided die and the Greeks took casualties on a 5-6 on a six sided die. The Persians though did have 2 large 36 man units with 24 archers in each that allowed them to reach out and touch the Greeks long before they were able to close into melee.

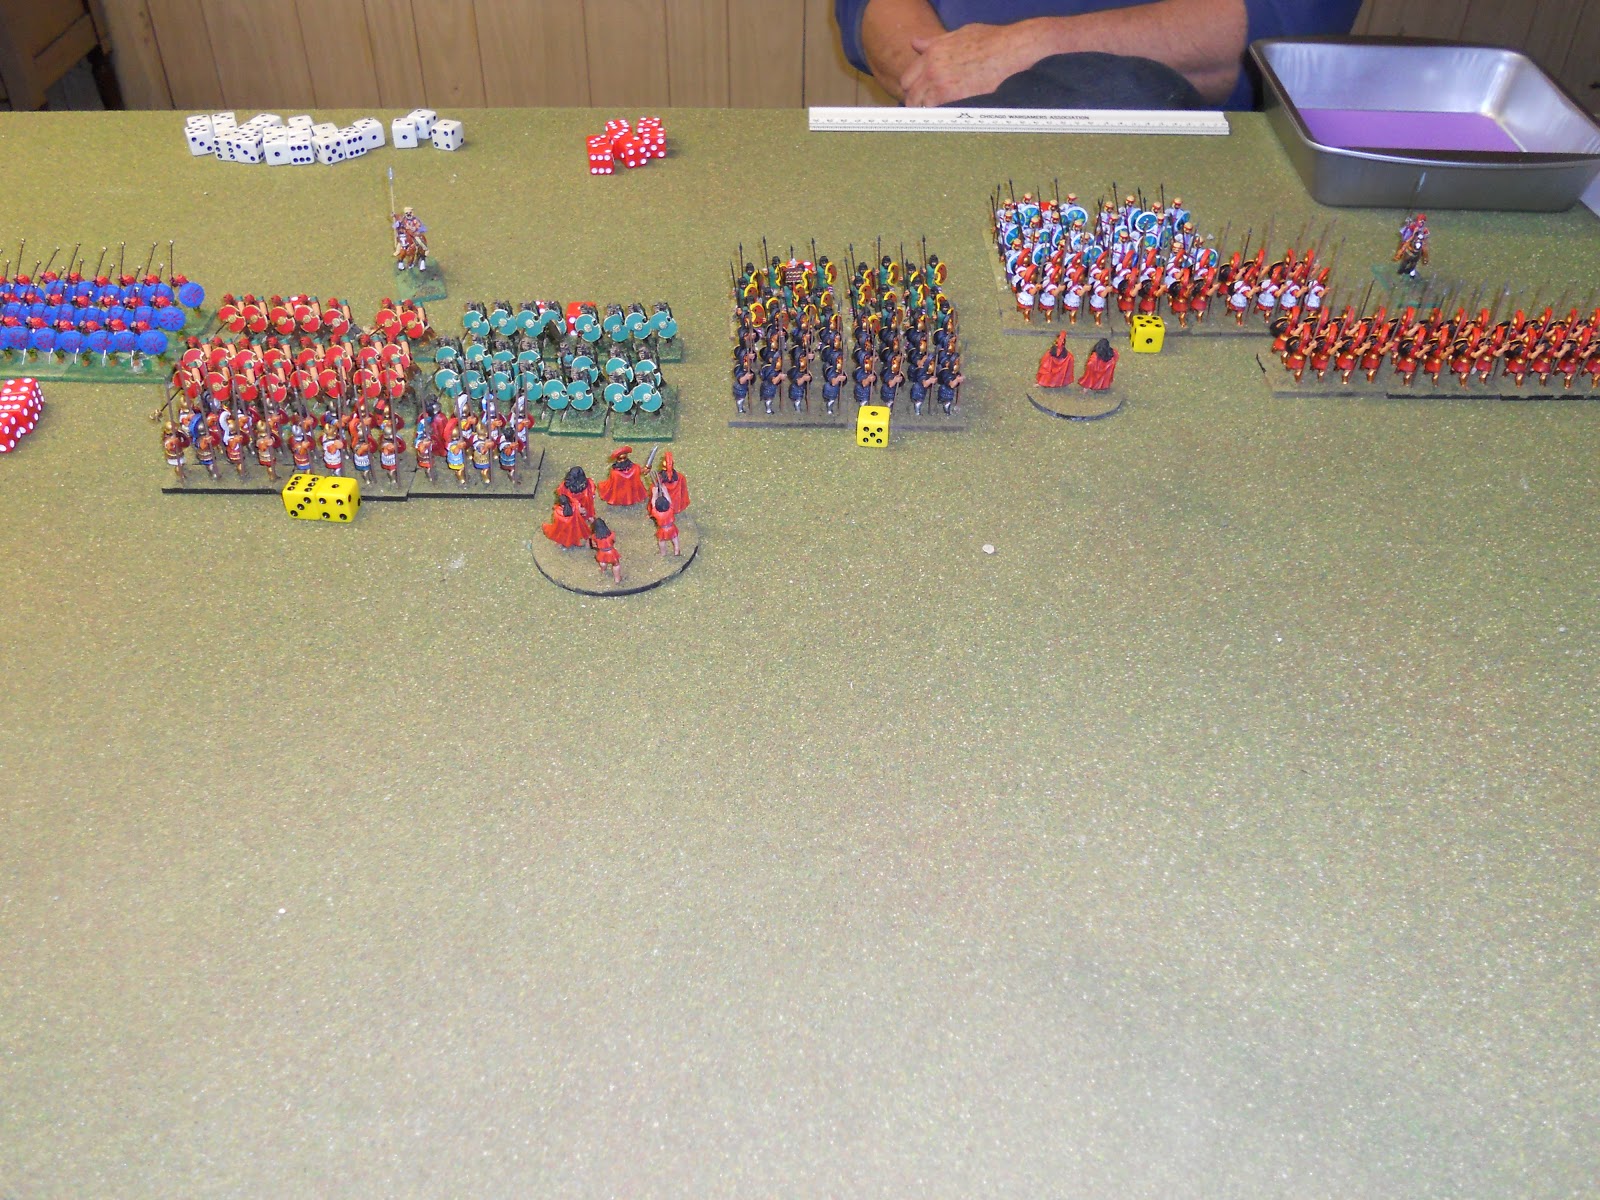
Here  is the initial set up. The Persians maintained a symmetrical set up and placed their two large bow units in the center with their light infantry spread evenly across their front.
The Greeks placed the Spartans on the right flank in honor of their reputation and leadership, while all their cavalry covered the left flank.
The Persians needed to destroy 6 of the Greek heavy infantry units to win while the Greeks needed to destroy 8 of the Persian heavy infantry units for them to win.

On turn one the Greeks won the initiative and passed the first move to the Persians who did little except deploy their cavalry on their right flank. The Greeks on the other hand. eager for battle, advanced across the field.


On turn two the Greeks again win the initiative and decide to keep it and take the first move.


Turn three sees the Persians win the initiative and keep the first move. They advance their archers to within range along with the light troops and deliver some very effective missile fire against the Greek center.

On turn four the Greeks win back the initiative and keep the first move to advance into melee with the Persian archers to nullify their galling fire. The Greek cavalry on their left charges their Persian counterparts and engage a what will become a slugging match with almost even exchanges of casualties. The light troops from both side engage in a lively exchange of greetings and missiles.


Turn five finds the Persians with the initiative and they keep the first move. Advancing their cavalry on their left flank the Persians are eager to get at the Spartans but a melee between some determined light infantry on that flank prevents them from getting at the Spartans. Meanwhile the Greeks keep advancing to get into melee with as many Persian units as possible hoping that their stronger units will prevail against the Persians greater numbers. The Greeks in the center have been severely mauled by the Persian archers. This turn the Greek cavalry finally wins the melee on the left flank and is now exposed to the Persian heavy infantry on that flank while being seriously hurt from the preceding melee.

On turn six the Greeks winn the initiative and keep the first move. This turn sees the first loss of units for each side. The Persians loose a large missile unit in the center while the Greeks barely hold their own in the middle also. On the Greek right flank both light units in melee finally succumb to each other and clear the way for the Spartans and the Persian cavalry to contact each other. General melees occur across the front. Third turn also sees two remarkable morale saves by the Greeks that allow them to send two of their opposing Persian units off the board. We also see the loss of the first Greek heavy infantry with many more in very bad shape.


Turn seven and eight have the Persians winning the initiative and retaining it on each turn. Alas, even though the Persians made a remarkable morale check it was not enough to stop the Greeks heavy infantry from inflicting serious losses to the Persian line. With the Greek center penetrated and Persian troops marching to the Greek rear, the Greeks snatched the victory and managed to destroy the eighth Persian heavy infantry unit to win the game.

All the players had a great time and Mike was the gracious host as always (even though he was on the loosing side). Ken as the Spartan General, did a remarkable job of inflicting damage to the Persian  line and managed to turn the Persian left flank putting the Spartans in a position to roll up their line. Both Mike and Bill had some intimidating die rolls that really had the Greeks worried for the entire game.

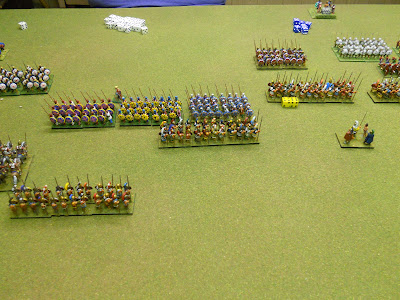
And again here is the eye candy we all wait for from Mikes units.


Thanks to all who stop in and good gaming.
Greg

Sunday, August 19, 2012

Barbarossa - Our experiment

Hi all,
Saturday we played out a Flames of War game based on Operation Barbarossa. The game was based in Army North's sector and did not have a specific historic location or units involved. We wanted to see if the Blitzkrieg would work with Flames of War rules.

The forces involved were extensive for Flames of War. On the Soviet side was a full Strelkovy Battalion and an aarmored company in reserve. The Soviets also had sporadic air support for interception only. The Germans had an infantry company, Czech Panzer company and a Medium Panzer company with two sets of priority air support on call.

The Soviets began the game dug in and secretly wrote down what sector their reserves came in, left, right or center. They also rolled to see what turn they would arrive. This could be from turn one to turn four. The Germans were not aware of when or where these reserves would arrive.

Here is the battlefield from the German left, center and right.


The above pictures are as the Soviets are setting up and before any German units are placed. It is a little difficult to see, but the terrain is mostly rolling hills with scattered woods and villages.

Above you can see the entire battlefield as seen from the German left and after the Germans and Russians have deployed.

The next four pictures are from the Soviet perspective and follow the bard from the Soviet right to left.


the German strategy was to use the infantry company to hold the Russians right flank and use the two armoured companies to break through the Russian center or left. The Czech company was placed on the German right flank and the Medium Armoured company was in the center. The German artillery was centrally placed to support all companies with the help of the air support.

Below we see the German first turn where they advance both armour companies with a smoke screen laid down to prevent an anti tank platoon from disturbing the advance. The German infantry digs in on the left.


The Soviets get off some A/T shots and cause minor casualties. Below we can see the effects at the end of turn two. The Germans continue their advance and the Soviets hold onto their initial positions.


On turn three the Russian reserves still have not arrived and the Germans are now engaged in assaulting the Russian positions in the center and on the Russian left. The Czech company is very successful in destroying the Soviet anti tank threat on the German right. They then concentrate on eliminating the Soviet infantry to their front and left.

Below is the situation on the German fourth turn.


In the top two pictures you can see that the Russian infantry has disintegrated before the German assaults. In the third picture you can see German recon and armour exiting the table which is helping to fulfill their victory condition of getting a full company of armour off the table. Looks like a cake walk at this moment.

Then on the Soviet portion of turn four tragedy strikes. The Soviet armoured reserve appears at just the right place at just in the nick of time.

Four KV-1's, 8 T-34's, 10 t-26's and 7 BA-7's arrive right in front of the German's medium tank company. A close range firefight causes tremendous losses to the Germans who then extract payment in part by destroying 3 of the 4 KV-1's with their 88 guns on the hill near the center of their base line.


The T-26 unit was severely mauled by a few Mk IV's and some 34t's. while the T-34's destroy anything in their way. At this point we had been playing for over 5 hours and decided to call the game a German minor victory as they managed to get some mobile units off the table and would, given enough time destroyed the balance of the Russian armour and infantry although at additional casualties.

So how did our little experiment play out? I think that the rules can provide a fair simulation of the events that transpired although it eludes us to find a way to recreate the human factor in a game of this size and scope. As we all know the Soviet armour was far superior to the German equipment yet the Germans were able to accomplish much more with less than their Soviet counterparts. Perhaps the folks at Battlefront will have some rules that can compensate for hindsight when their Barbarossa rules finally come out.
Good gaming!! Greg


Friday, August 17, 2012

Check out this paint job!

Hi all,
Here are some picture of a figure that my oldest son just finished. Nice work by my standards or anyone else's for that matter. But I am prejudiced. So see for yourself.


Note the sword and light on the back of the cape are all freehand. The figure is a warrior priest from Dungeons and Dragons but I do not know the manufacturer.
Greg
Ps. The figure is from Reaper Miniatures