Hello to everyone. This is my first attempt to explain a building project that was recently completed. The model is a 25/28mm version of the church from the great 'The Magnificent Seven' movie released n 1960 by MGM and staring a host of actors including Yul Brenner, Steve McQueen, Robert Vaughn, James Coburn and many others.
This project took about 3 weeks to complete in my spare time. While I am retired I probably spent about 12 to 15 man hours working on it. This does not include time spent waiting for paint and or glue to dry. The material is 1/4" foamcore, bits and pieces of wood from craft stores, some jewelry making bits also from the craft store, craft paint, wall patch and some other odds and ends to be explained in the write up. cost of all materials is about $15.00 or less.
Now on with the project.
I first did some research on the appearance and size of the actual church. Using the internet and searching for the movie and then displaying images I was able to find a number of useful pictures. I also watched the movie (for about the tenth time) to gain more information on details and size.
Here are some of the photos used. Please note that these are copyright protected by MGM.


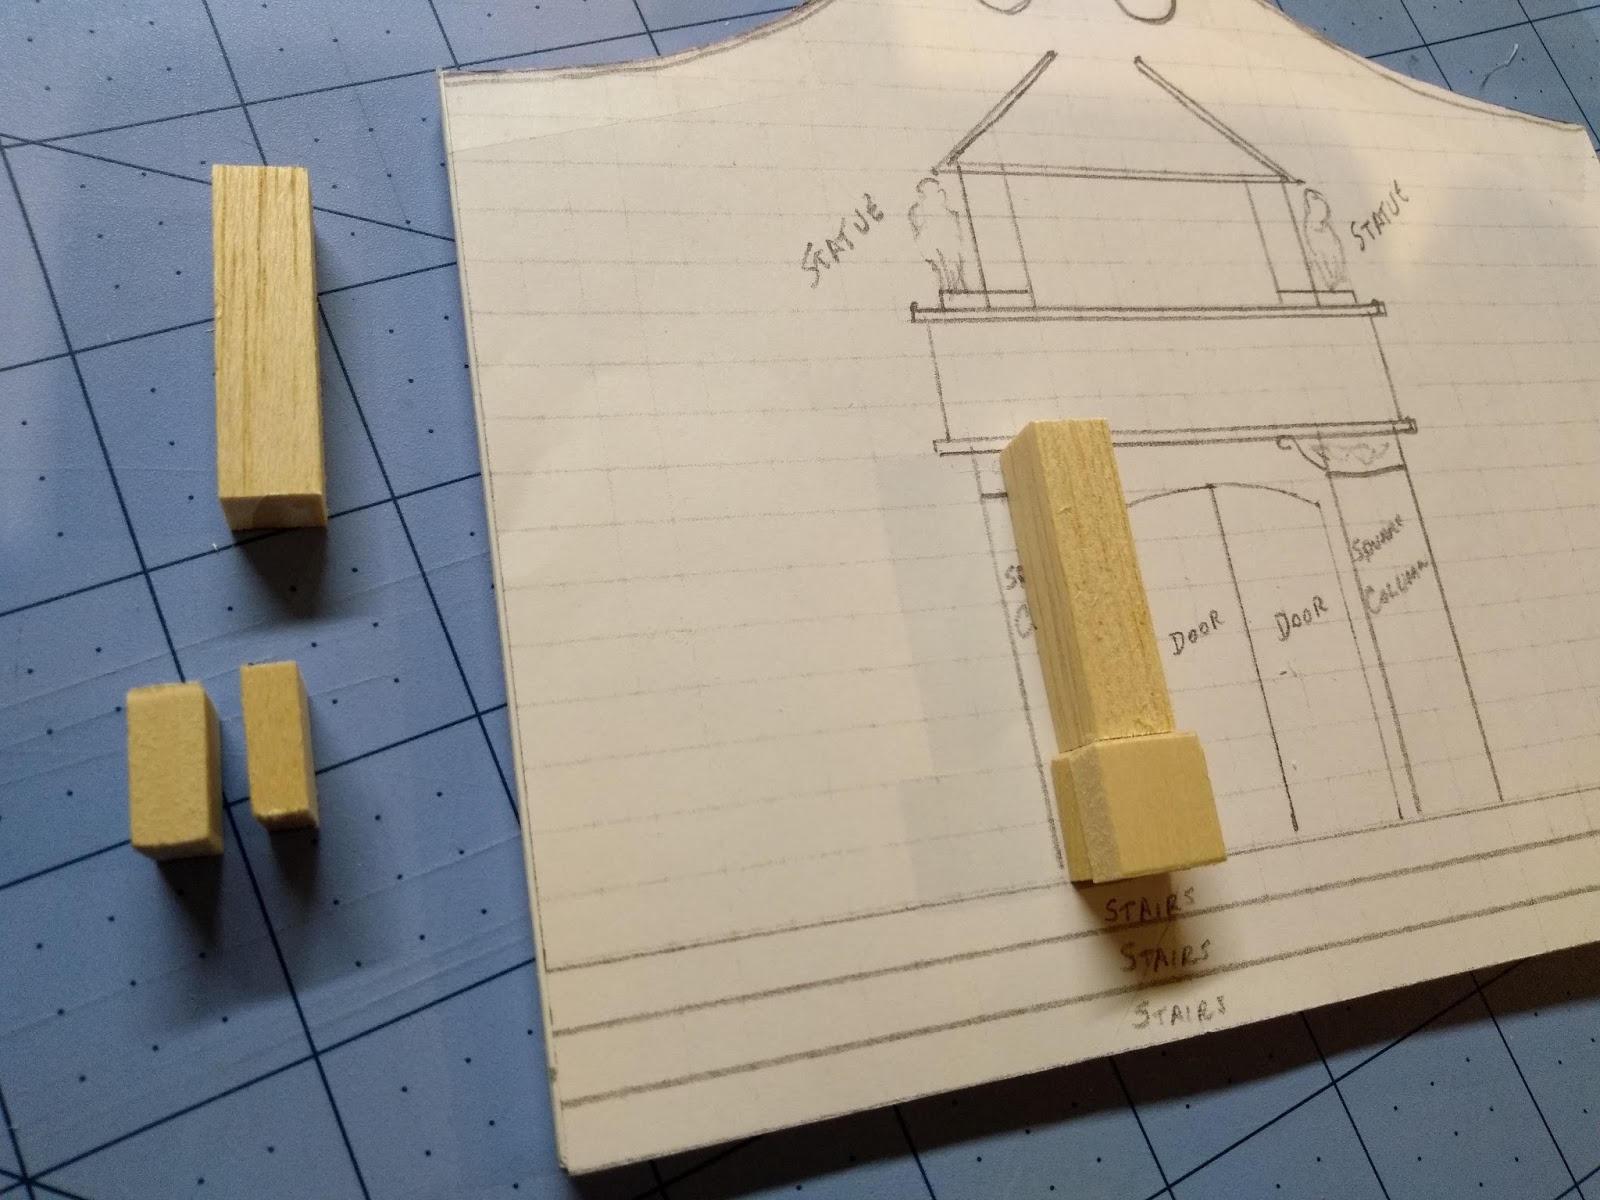
 I gathered my materials and started by taking some graph paper to draw out the front of the church to full scale.
 This gave me a a good blueprint to work from and the height and width of the finished model.
Next I cut a piece of the foamcore to to the same overall dimensions of the model and taped a copy of my drawing to it allowing me to have a pattern to cut the curved portions of the church easily.


 At this point I put apiece of carbon/tracing paper under my drawing so I can transfer the church details onto the foamcore. I also cut the sides and back of the church.
 After cutting these walls I used an X-ACTO tool shown below to cut overlaps to give me square corners.
 Here you can see the edge ready for attachment. One wall of the corner is cut and the other is left square.
 Before tracing the details onto the foamcore I cut and laid out the details for the front of the church. These were cut from scraps of wood accumulated over the years and also from doll house trim purchased from craft stores.


 The circular bit at the top of the church was left off in the finished model as it was too fidley to attach properly. Note that the crosses seen n the picture are also from craft store jewelry bits.
 I must also confess that this project was made easier through the use of a mini table saw that allowed me to get near identical cuts for the many pieces that went into the facade of the church.
Below is a picture of the walls cut to size.
Next I cut the stairs for in front of the church. These were then hot glued to each other with the largest on the bottom and the smallest on top.

 Below you can see the finished stairs being checked for alignment against the front of the church.


 Here is the scribe used to trace the patterns.


 Not a bad fit!
 The bell tower was made in two parts. The main tower and the upper area that holds the bell itself.
 Again I used the X-ACTO tool to cut the sides of the tower for a nice clean fit.
 Here is the upper portions walls.
 Below you can see the bits and pieces added to the upper tower roof starting to give it it's general shape and outline. These are MDF and parts of wood shapes from the craft store.


 This is some bamboo wallpaper I had obtained from a wallpaper clearance store for a few dollars years ago. I will be using this on the roof of the main building.
 Here I added the decorative trim around the upper edge of the church facade. This was again an item found in the craft store jewelry section and is cord used for making necklaces or bracelets. This was attached with the glue gun. In the background you can see the finished roof sections after being attached to their cardboard bases.
 And here you can see the roof panels set in place to see how they look and fit.
 Here I have added the trim to the top of the lower tower and have also cut away the top layer of cardboard from two sides of the bottom of the tower. This will be exposed brick where the stucco has fallen away.
 For the interior floor of the church I printed a stone pattern from my computer that I found on the internet. I glued this to the floor using a glue stick. I found that using a heavy application of this provides a fast and secure way to glue paper to paper.
 Next you can see the rafters Made from more foamcore scrap and attached to the roof panels. You can also note that one is at a strange angle. Poor form on my part but it will not be seen or effect the finished model.


Here is the church with a coat of paint and two 15mm figures mounted as statues. These will be smeared with a plaster mix to make them look weathered and disintegrated / aged.

 To make the surface look more like stucco and to mute the surface of the details and help them to look worn I used lightweight wall patch and water. Mixing them on a pallet and then painting the mixture on the exterior of the church and the tower.

 After painting the plaster mix on I very lightly sanded the area with 400 grit sandpaper to remove excess plaster.


Now we are moving on toward the end product. Below is a picture of the painted walls having a wash applied.

And here we see the church taking shape.

 Please note the cross on the top of the tower, again from the craft store jewelry section. Also in the picture below you can see the doors in place and some wood pices in front of the window area above the doors.
 Here you can see the interior of the church. The walls were painted a light cream color. All the pictures were again downloaded from the internet. The cross on the wall is from the craft store wood pieces section.
 The pews, alter and interior doors are from coffee stirrers and bits of balsa wood stained with washes. Pictures were glued in place with the glue stick.

So there you have it. The only thing missing is the bell in the tower which will be acquired and attached soon. Yet again from a craft store.
I appreciate any comments on this project. Yet to come I will be building many if not all of the other buildings from the movie as well as some walls, well and crop storage. Figures are cleaned and waiting to be painted although I need a few more peons and bandit types.
Take care and good gaming,
Greg
This project took about 3 weeks to complete in my spare time. While I am retired I probably spent about 12 to 15 man hours working on it. This does not include time spent waiting for paint and or glue to dry. The material is 1/4" foamcore, bits and pieces of wood from craft stores, some jewelry making bits also from the craft store, craft paint, wall patch and some other odds and ends to be explained in the write up. cost of all materials is about $15.00 or less.
Now on with the project.
I first did some research on the appearance and size of the actual church. Using the internet and searching for the movie and then displaying images I was able to find a number of useful pictures. I also watched the movie (for about the tenth time) to gain more information on details and size.
Here are some of the photos used. Please note that these are copyright protected by MGM.


Next I cut a piece of the foamcore to to the same overall dimensions of the model and taped a copy of my drawing to it allowing me to have a pattern to cut the curved portions of the church easily.


Below is a picture of the walls cut to size.


Next I started to make the doors for the church. I used 3 coffee stirrers glued to a very thin piece of balsa wood. I held them down with some full craft paints to prevent warping until it dried.


Using some thin corrugated cardboard from the inside of a case of cat food I cut the base for the roof. While shopping I am always on the lookout for things I can use in a project. Asking for packaging in a store is almost always granted.

Below is the front of the church after tracing the details to it with the carbon/tracing paper.


We have done a bit of work here and as you can see most of the details for the facade are glued in place. I used white glue for these pieces. You can also see that the walls and stairs have all been glued together. For this I used a glue gun. Reinforcement for the corners was put in place also.


Next comes the floor. I traced the area inside the walls onto a piece of foamcore and cut it out. I added 3 layers of scrap material to the bottom of the floor to raise the floor to the same level as the top of the stairs as I intend to have the interior of the church finished.


Here you can see jewelry parts (also from the craft store) being used to add shape and pattern to the tower roof. Trim around the tower is cut from some doll house trim.


Here is the church with a coat of paint and two 15mm figures mounted as statues. These will be smeared with a plaster mix to make them look weathered and disintegrated / aged.


Now we are moving on toward the end product. Below is a picture of the painted walls having a wash applied.


So there you have it. The only thing missing is the bell in the tower which will be acquired and attached soon. Yet again from a craft store.
I appreciate any comments on this project. Yet to come I will be building many if not all of the other buildings from the movie as well as some walls, well and crop storage. Figures are cleaned and waiting to be painted although I need a few more peons and bandit types.
Take care and good gaming,
Greg
What a pleasure to follow this creative and awesome job...Congrats!
ReplyDeleteThanks Phil - more to come soon.
DeleteI've enjoyed seeing how you built this model. Thank you for sharing it.
ReplyDeleteTony
Thanks Tony. It was a pleasure to build. I am currently working on the next building for the village.
DeleteAwesome work!
ReplyDeleteThank you sir!
ReplyDeleteWow! What a fantastic project - thanks for the work flow explanations! Do you happen to know where I can get replacement tips for my Loew Cornell #S-51 scribe? I can't seem to locate any online. My search for tips brought me to your church project website - excellent work!!! ~Mark
ReplyDelete